So, you’ve just acquired the latest and greatest iPhone, huh? Congratulations! Now comes the not-so-fun part: setting it up. But fear not, because we’ve got you covered. In this step-by-step guide, we’ll walk you through the process of setting up your new iPhone, from unboxing to personalization. Whether you’re a seasoned iPhone user or a newbie to the Apple ecosystem, there’s something here for everyone. So, let’s dive in and discover how to make the most of your shiny new device.
Unboxing and Powering On
To begin the process of setting up your new iPhone, start by unboxing it and powering it on. The unboxing experience of an iPhone is always exciting. Gently remove the sleek packaging, feeling the anticipation build. Once you’ve unwrapped the box, lift the lid to reveal your new device nestled inside. Take a moment to appreciate the elegant design and craftsmanship.
Now, let’s power on your iPhone. Press and hold the power button located on the side or top of the device until you see the Apple logo appear on the screen. It may take a few seconds for the device to fully turn on. Once it’s powered on, you’ll be guided through the initial setup process.
Sometimes, you may encounter common issues during the unboxing or powering on process. If you’re unable to turn on your iPhone, make sure it’s charged by connecting it to a power source using the lightning cable and charger provided. If the issue persists, try performing a hard reset by pressing and holding both the power button and volume down button until the Apple logo appears.
Activating Your Iphone
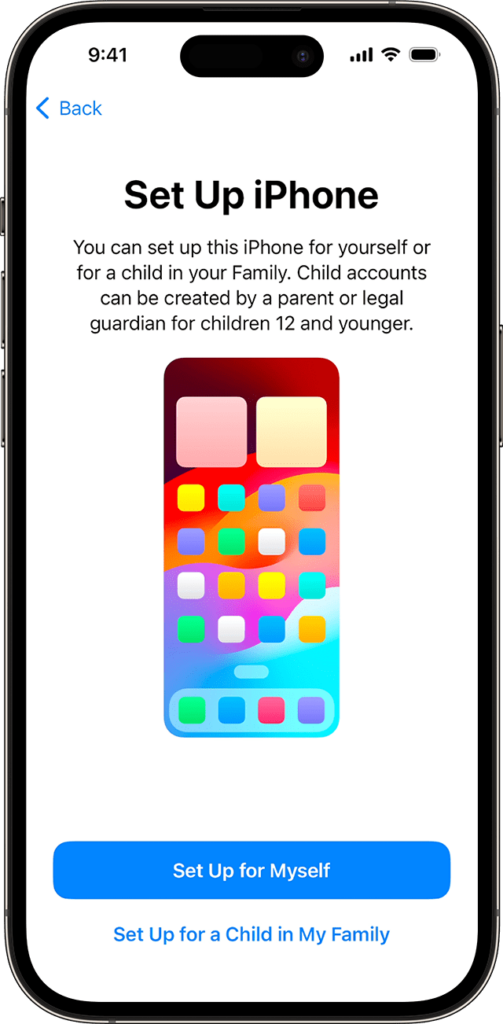
After successfully powering on your iPhone, the next step is to activate it. Activating your iPhone is a crucial step to start using all its features and functionalities. Here is a step-by-step guide to help you activate your iPhone smoothly:
- Connect to Wi-Fi: Make sure you have a stable internet connection by connecting your iPhone to a Wi-Fi network.
- Follow on-screen instructions: Once connected to Wi-Fi, follow the on-screen instructions to proceed with the activation process. These instructions will guide you through the setup process, including signing in with your Apple ID or creating a new one.
- Troubleshooting activation issues: If you encounter any issues during the activation process, try restarting your iPhone and ensuring you have a strong internet connection. If the problem persists, you can visit the Apple Support website or contact Apple Support for further assistance.
- Activating multiple iPhones simultaneously: If you have multiple iPhones that need activation, you can use the Quick Start feature. Simply place the new iPhone near the already activated iPhone, and follow the on-screen instructions to transfer your settings, apps, and data seamlessly.
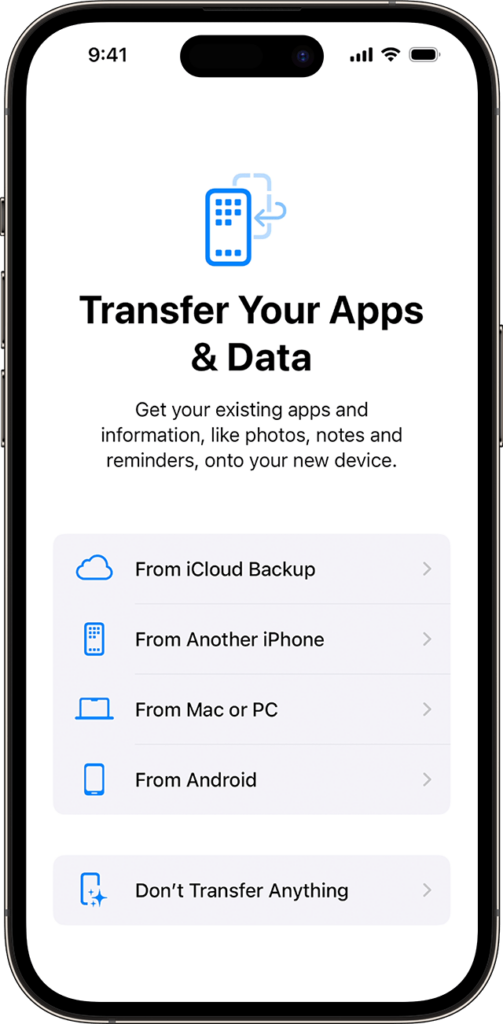
Transferring Data From Your Old Iphone
To transfer data from your old iPhone to your new one, follow these steps. First, ensure that both devices are connected to Wi-Fi and plugged into power. On your new iPhone, you will need to go through the initial setup process until you reach the “Apps & Data” screen. Select the option to “Transfer from iPhone” and wait for a code to appear. Now, take your old iPhone and go to the Settings app. Tap on your name, then select “iCloud” and “iCloud Backup”. Make sure that your old iPhone is backed up to iCloud. Next, choose the option to restore from an iCloud backup and enter your Apple ID and password. After that, select the most recent backup from the list and wait for the transfer to complete.
If you encounter any issues during the data transfer, there are a few troubleshooting steps you can try. Firstly, make sure that both iPhones are running the latest version of iOS. Additionally, ensure that both devices have enough storage space to accommodate the transfer. If the transfer is taking too long or keeps getting stuck, try restarting both iPhones and attempting the transfer again. If these steps do not resolve the issue, you may need to contact Apple Support for further assistance.
Setting Up Touch ID or Face ID
Set up Touch ID or Face ID on your new iPhone to enhance the security and convenience of unlocking your device. These features provide a secure and effortless way to access your phone. Here’s how you can set them up:
- Advantages of Touch ID or Face ID:
- Enhanced Security: Touch ID or Face ID adds an extra layer of security by using your unique fingerprint or facial features to unlock your device, making it difficult for unauthorized users to access your personal information.
- Convenience: With Touch ID or Face ID, you can unlock your iPhone with just a simple touch or glance, saving you time and eliminating the hassle of entering passcodes.
- Apple Pay: Touch ID or Face ID also allows you to make secure and seamless payments using Apple Pay, without the need to enter your credit card information.
- App Authentication: Many apps now support Touch ID or Face ID, allowing you to log in or authenticate transactions with ease.
- Limitations of Touch ID or Face ID:
- Accuracy: Touch ID or Face ID may have difficulty recognizing your fingerprint or face in certain conditions, such as wet fingers or low lighting.
- Multiple Users: Touch ID or Face ID can only be set up for one user per device, which means you cannot share your device with others using their own fingerprints or faces.
- Privacy Concerns: Some users may have concerns about the privacy implications of storing their biometric data on their device.
- Troubleshooting Touch ID or Face ID Issues:
- Clean Your Fingers or Face: Ensure that your fingers or face are clean and dry before trying to use Touch ID or Face ID.
- Update iOS: Make sure your iPhone is running the latest version of iOS, as updates often include improvements and bug fixes for Touch ID or Face ID.
- Re-register Your Fingerprint or Face: If Touch ID or Face ID is consistently not working, try deleting and re-registering your fingerprint or face in the settings.
- Contact Apple Support: If you’re still experiencing issues with Touch ID or Face ID, reach out to Apple Support for further assistance.
Setting up Touch ID or Face ID on your new iPhone provides you with the advantages of enhanced security and convenience. However, it is important to be aware of the limitations and to troubleshoot any issues that may arise to ensure a smooth experience with these features.
Related: Latest Rumors About the Iphone 16 Pro
Customizing Settings and Personalizing Your Iphone
Now that you have set up Touch ID or Face ID on your new iPhone, let’s explore how you can customize settings and personalize your device. One way to make your iPhone truly yours is by customizing the wallpaper. To do this, go to Settings, then Wallpaper, and choose either a dynamic, still, or live photo. You can also select an image from your photo library or choose from the preloaded wallpapers. Once you’ve chosen your preferred wallpaper, you can set it as your home screen or lock screen, or both.
Another way to personalize your iPhone is by organizing your home screen. You can rearrange your app icons by tapping and holding on an icon until they all start wiggling. From there, you can drag and drop the icons to any position you want. You can even create folders to group similar apps together. To create a folder, simply drag one app icon onto another. You can customize the folder’s name and add more apps to it as well.
Conclusion
In conclusion, setting up your new iPhone is a simple and straightforward process. By following the step-by-step guide provided, you can easily unbox, activate, and transfer data from your old iPhone. Don’t forget to personalize your iPhone by setting up Touch ID or Face ID and customizing the settings to your preferences. Enjoy your new iPhone and all the amazing features it has to offer!